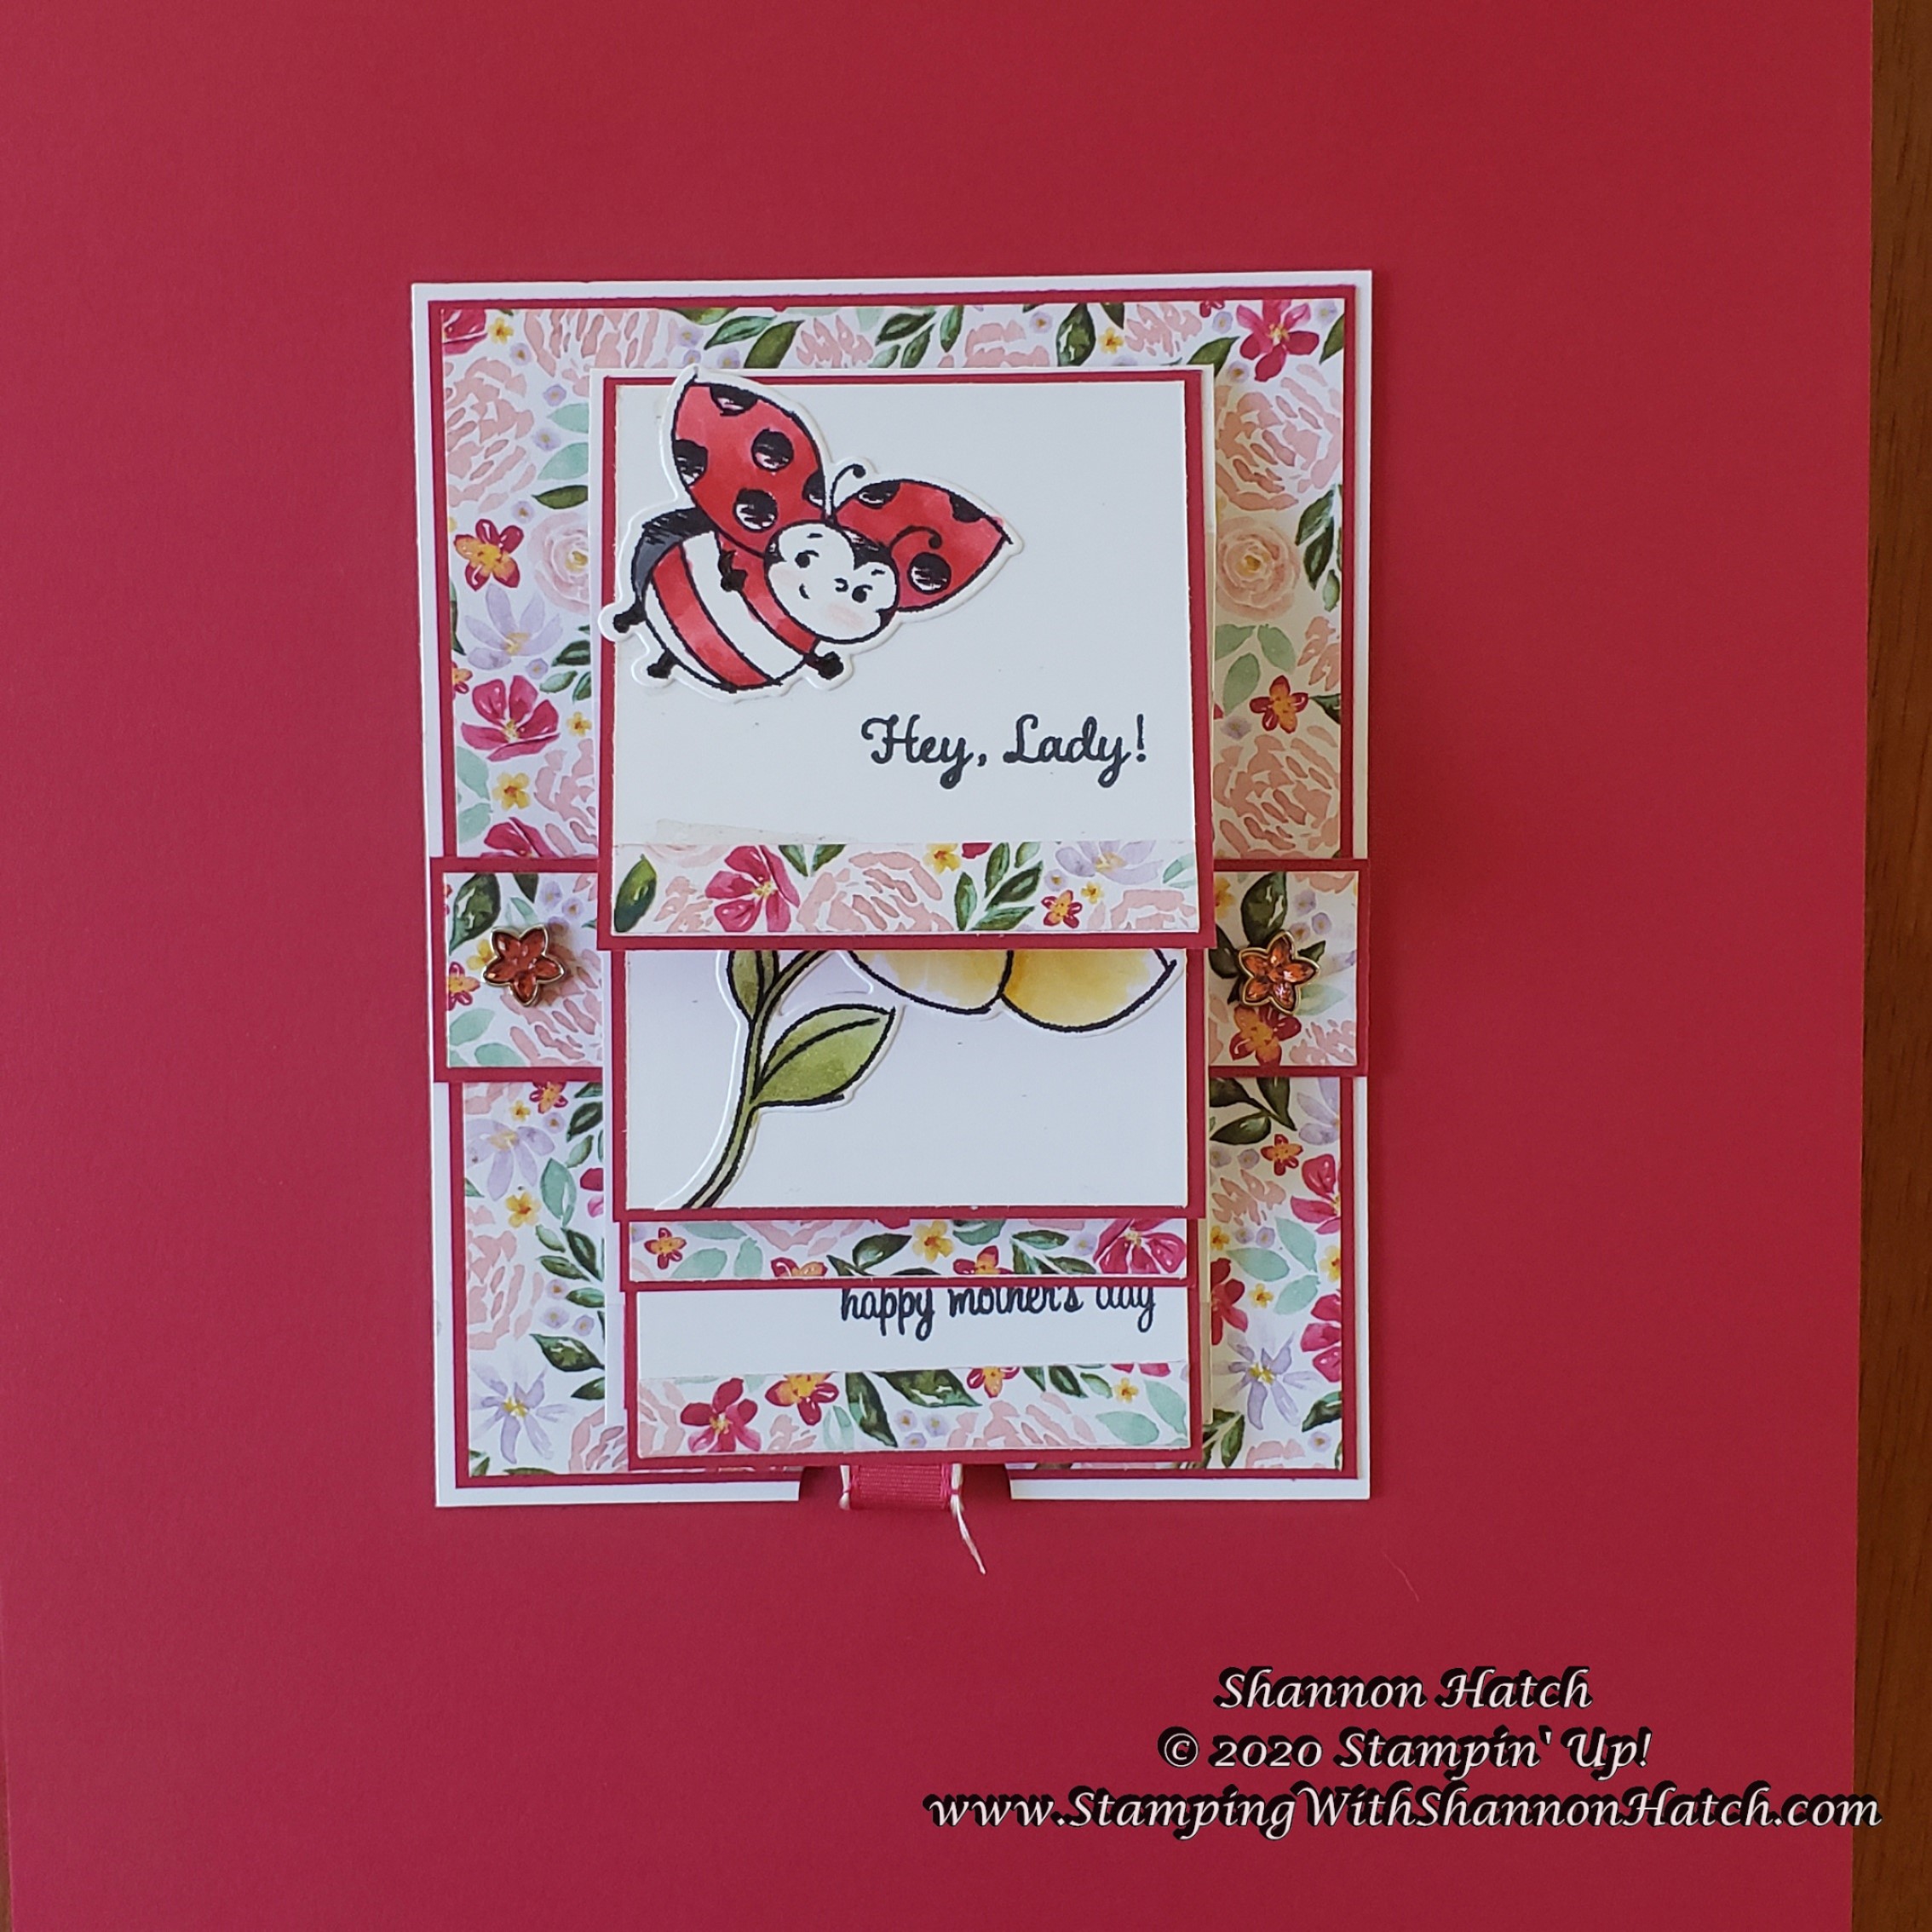
A Little Waterfall of Mother’s Day Wishes
Hey! Thanks for stopping by my little happy spot. Take a look around and hope you enjoy.
Exciting News!!!! the 2024-2025 Annual Catalog has gone live! Check it out, click on image below for the digital catalog!
OR click HERE to go to the website

I created this Mother’s Day card for a dear friend….her son and my son are very close friends, as a matter of fact she and I call each other “mother #2” to the other son. My son is her 2nd son and her son is my 2nd son. She is a fan of ladybugs so I had the perfect stamp set and coordinating dies to go with it. Unfortunately this “bundle” is retired, but it is super cute and cannot be filed away with the other retired sets.
Here is how this process played out. I used the Little Ladybug stamp set and Ladybug dies, which were Sale-a-bration items that sold out and retired very quickly. I have 1 spare stamp set if anyone is interested please contact me if you would like it (first come, first serve). I paired this adorable set with the Best Dressed Designer Series Paper. Whisper White and Lovely Lipstick cardstock were used for the card base, waterfall mechanism and various mats. The sentiments came from the Itty Bitty Greetings Stamp Set and from the Little Ladybug stamp set.
If this is a first time Waterfall card for you, I suggest doing a prototype/Mock-up so you can get a feel of how the piece will come together. It is truly pretty easy….once you get your head wrapped around how all the parts and piece come together and work together. All of the measurements for this card are based on a 1/8″ border around all components.

For this waterfall card, I began with a Whisper White cardstock waterfall pulling mechanism measuring 2-3/4″ x 9″ scored at 2″; 2-3/4″; 3-1/2″; 4-1/4″. The 9″ length is pretty universal, but the width can be determined by the width of the largest feature you want included in the waterfall of images. In my case the large flower image was my guide.
The Whisper White base is the standard is a single piece of card stock cut to a standard size of 4-1/4″ x 5-1/2″. The front has a Lovely Lipstick mat cut to 4-1/8″ x 4-3/4″ and a Best Dressed DSP mat cut to 4″ x 5-1/4″. The Belt that will hold the pull mechanism in place is Lovely Lipstick card stock cut to 4-1/4″ x 1″ and a DSP strip cut to 4-1/8″ x 7/8″. The mats for the various levels of the waterfall are cut from Lovely Lipstick and are: (3) 2-5/8″ x 2-5/8″ and (1) 2-5/8″ x 3″. The smaller Whisper White mats are: (3) 2-1/2″ x 2-1/2″ and (1) 2-1/2″ x 2-7/8″. The backside of the card base is matted with a piece of Lovely Lipstick cut to 4-1/2″ x 4-7/8″, DSP mat of 4″ x 4-3/4″ and a Whisper White piece cut to 3-1/2″ x 4″ giving room for a special note.

Adhere all the mats together. To the card front adhere the Lovely Lipstick and Best Dressed DSP Panel, attach the belt to the card front with liquid adhesive. The top of the belt should be located 2-5/8″ from the bottom of the card base. Use a 1″ circle punch to punch out a finger pull area for the waterfall mechanism. Adhere the smaller Whisper White mats to the larger Lovely Lipstick mats. Stamp, render and die cut the images from the Little Ladybug set, adhere with glue where you choose, allowing room for sentiments and the decorative strip (3) 2-1/2″ x 3/8″. Finish each level of the waterfall, attach the finished matted piece to the waterfall with glue or tear -n- tape along the scored line of the the waterfall mechanism. One strip of tape or line of glue is all you need along the top of your matted piece, no more, it needs the flexibility to flip nicely.

On the long portion of the mechanism – on the back side, create a mat of Lovely Lipstick 2-5/8″ x 4-1/4″, topped with a DSP mat of 2-1/2″ x 4-1/8″ and a Whisper White writing or stamping piece to 2-1/4″ x 3-7/8″. Before attaching the Whisper White piece, adhere a piece of ribbon to the bottom portion of this flap for pulling, once dried, attach the final piece of Whisper White and attach the final ladybug image.

Now with everything put together, it is time to attach the finished waterfall pulling mechanism to the card. Slide the longer portion of the mechanism through the belt, so the finger pull ribbon does not stick below the card base. Be sure the mechanism is centered in the belt. Apply Tear -n- tape along the bottom portion of the belt where the bottom portion of the mechanism will rest (the box below the 2″ score line). This will secure the mechanism to the belt and will allow the pull mechanism to work effortlessly.
Thanks again for stopping by and spending a bit of your time with me. I hope you enjoyed learning about how this card came together. Hopefully you were even inspired just a bit. Below are pictured links to all the items used for this card, click the link of the item to be taken to my online store where you can learn more about each item. I will return soon with something new. Until then, stay safe, stay healthy and without doubt, keep on crafting, exploring and creating.
2024-2026 Annual Catalog is now live!
Join my Stampin’ Up! Team and fill your starter kit with 2024-2026 In-Color products for Free through 31 May 2024.
Between 1–31 May, Stampin’ Up! has a fantastic offer for anyone who becomes a demonstrator! Join my team and receive FOUR brand new In Color products in your Starter Kit at no additional cost. These products include:
- 2024–2026 In Color Classic Stampin’ Pad Bundle
- 2024–2026 In Color 8-1/2″ x 11″ (21.6 x 27.9 cm) Cardstock
- 2024–2026 In Color 6″ x 6″ (15.2 x 15.2 cm) Designer Series Paper
- 2024–2026 In Color Stampin’ Write Markers
Altogether, you’ll get the four In Color products, your choice of $125 worth of products, free shipping, and free business supplies for just $99! Being a part of Stampin’ Up!’s creative community also comes with several perks, including early access to products, special discounts, earning product credit, exclusive trainings, demonstrator-only events, and so much more!
As a demonstrator, I am here to help you throughout the join process and beyond. If becoming a demonstrator is something that you are interested in, please reach out! I am excited to answer all your questions and help get you started on your creative journey.
May 2024 Paper Pumpkin Kit
About the Kit:
JULY: Painted Petals
Subscribe 11 June–10 July by clicking here!
Craft beautiful cards with unique watercolor designs and pretty layers!
• Makes 9 cards: 3 each of 3 designs
• Project includes printed cards and coordinating envelopes
• Precut paper pieces and embellishments
• Coordinating colors: Calypso Coral, Gray Granite (Classic Stampin’ Spot), Melon
Mambo, Mossy Meadow, Old Olive
Paper Pumpkin Exclusive July – September Coordinating Add-on Die
Subscribers can also shop the exclusive Every Celebration Dies, which coordinates with April, May and June.
164991 Paper Pumpkin Every Celebration Dies.

Paper Pumpkin Subscription information:
Subscribe to the April Paper Pumpkin Kit between 11 June–10 July by clicking here!
Paper Pumpkin Subscription Options
Shop Online Exclusives – Products NOT found in the catalog
Exclusive and All-inclusive Kits Collection by Stampin’ Up! No Subscription required
Product List
Don’t miss a thing – Here are our current promotions

August 2023 Gifting Code: EBWQGUU9
Please DO use this gifting code if your order is under $150 to receive a free gift from me. If your order is over $150 DO NOT use the host code and receive Stampin’ Rewards, anything in the catalog, that amounts to $15 or more (depending on the amount of your order) from Stampin’ Up! If your order is over $125, consider getting a starter kit for $99 with free shipping. No selling required, sit back and enjoy your hobby while enjoying a 20% discount with every order you make. Contact me if you have any questions.
May 2024 Paper Pumpkin Kit
About the Kit:
JULY: Painted Petals
Subscribe 11 June–10 July by clicking here!
Craft beautiful cards with unique watercolor designs and pretty layers!
• Makes 9 cards: 3 each of 3 designs
• Project includes printed cards and coordinating envelopes
• Precut paper pieces and embellishments
• Coordinating colors: Calypso Coral, Gray Granite (Classic Stampin’ Spot), Melon
Mambo, Mossy Meadow, Old Olive
Paper Pumpkin Exclusive July – September Coordinating Add-on Die
Subscribers can also shop the exclusive Every Celebration Dies, which coordinates with April, May and June.
164991 Paper Pumpkin Every Celebration Dies.

Paper Pumpkin Subscription information:
Subscribe to the April Paper Pumpkin Kit between 11 June–10 July by clicking here!
Paper Pumpkin Subscription Options

In-colors 2018-2020 will be retiring 2 June 2020. If there is something in these colorways that you must have in your stash, no is the time, while supplies last. When they are gone, they are gone.
Product List


Ornate Garden – An early release for a new suite coming in the 2020-2021 Annual Catalog.


