Wanna make some buttons?
Hey! Thanks for stopping by my little happy spot. Take a look around and hope you enjoy.
Exciting News!!!! the 2024-2025 Annual Catalog has gone live! Check it out, click on image below for the digital catalog!
OR click HERE to go to the website

These are so much fun to make, they take some time, but it is so much fun to add them a project – art journal, card, tag, book mark – the ideas are endless.


What a great way to use up scraps of paper! The button can be any size or shape you want to make it and can be made with Designer Series Paper, any scrapbook paper, Decorative Napkin, any card stock, deli paper with or without a design that you have stamped or drawn. Any inks that are used on any substrate need to be waterproof/permanent inks.
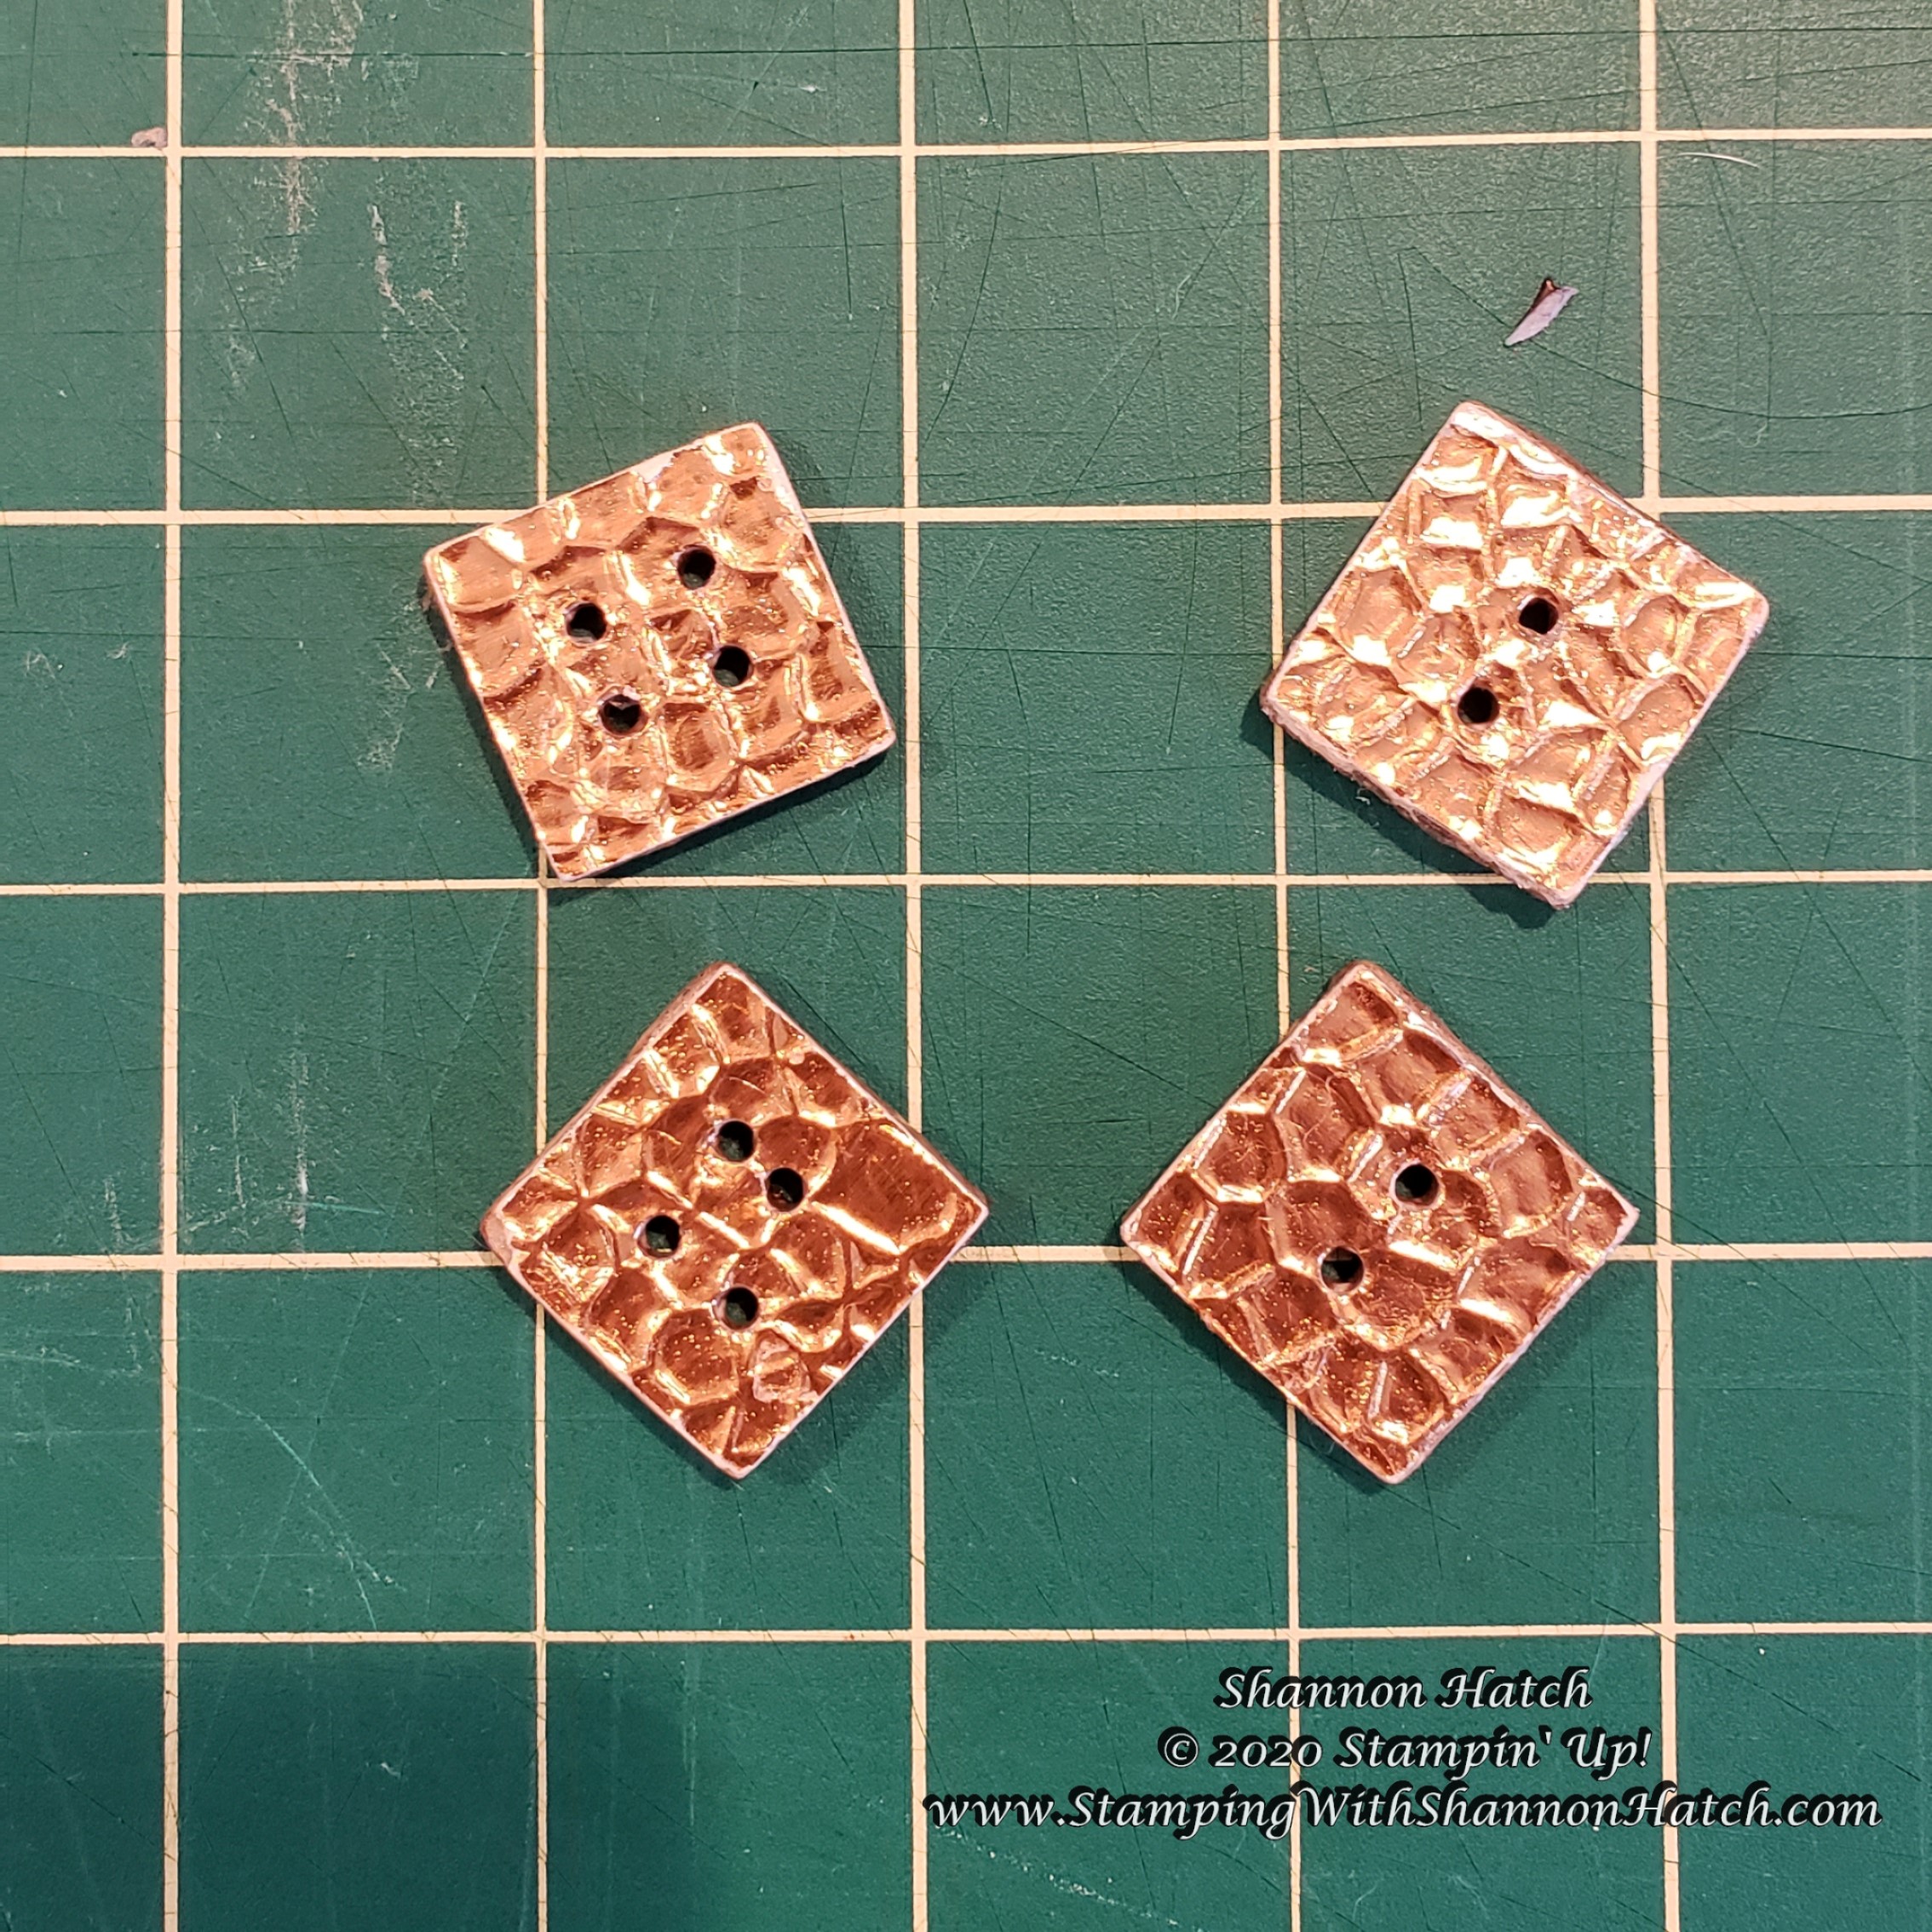
For these buttons I used Copper foil paper that was embossed with the Hammered Metal 3D Embossing Folder. For ease and to help you get the idea these are square 1″ buttons. Again, design ideas are limitless. I suggest using chip board or several layers of cardboard – use cereal boxes, the back of a paper pad, anything that can be glued together and provide ample structure for the button.
- This button uses 3 layers of chip board cut 1″ x 1″ square. Also cut your paper or fabric of choice. I used the embossed copper foil, also cut to 1″ square.
- Glue these layers together with glue, make sure your decorative paper or fabric is on the top. I use Fabri-Fix, it is a good strong clear silicone glue, flexible enough to use a hole punch when ready. Make sure all the edges are as aligned as they can be. Allow all these layers to dry. I recommend an hour or so.
- Come in with a sanding block, smooth the edges on all 4 sides. If you want a rustic button, then no sanding is required. The sanding just offers a smooth, polished button.
- Once you are satisfied with the smoothness of the sides, it is time to punch the button holes. How many do you want? Do you want 2, 3 or 4? You could do 1 hole and top it off with a bead or flat backed gem or pearl. For the holes I recommend a Crop-a-dile. It will make quick work of this task, if you think you can handle a single hole puncher then go for it. If you button is thick, it will be tough.
- Create a template on scrap paper for the hole placement, be sure the template remains aligned on the button top where the holes are to go and punch away, making sure to follow the template as best as possible. It is easy to get off just a bit – you can see that in the picture above.
- Once the holes are punched, its time to seal the coat all of your homemade buttons with a Fluid or Gel Medium or Mod Podge. The other choice to make is do you want a glossy finish or a matte finish. There is a glossy and matte version of Mod Podge as well as Fluid or Gel Mediums, I also like using a Gloss Varnish. As far as mediums/varnishes go, I enjoy using Golden or Liquitex. Coat the buttons front, back and sides with your sealant of choice and allow them to dry thoroughly – I would give it a good couple of hours.

Thanks again for stopping by and spending a bit of your time with me. I hope you enjoyed learning how to make this sort of ephemera, they are loads of fun. Hopefully you were even inspired just a bit to create something new. I will return soon, until then keep safe and healthy, and occupy your mind with crafty things. By all means keep on crafting, exploring and creating. Chat with you soon.